If you have any questions or dificulities manging your business website, just reach out to our Customer Success Managers!
How to point your domain name to your new website
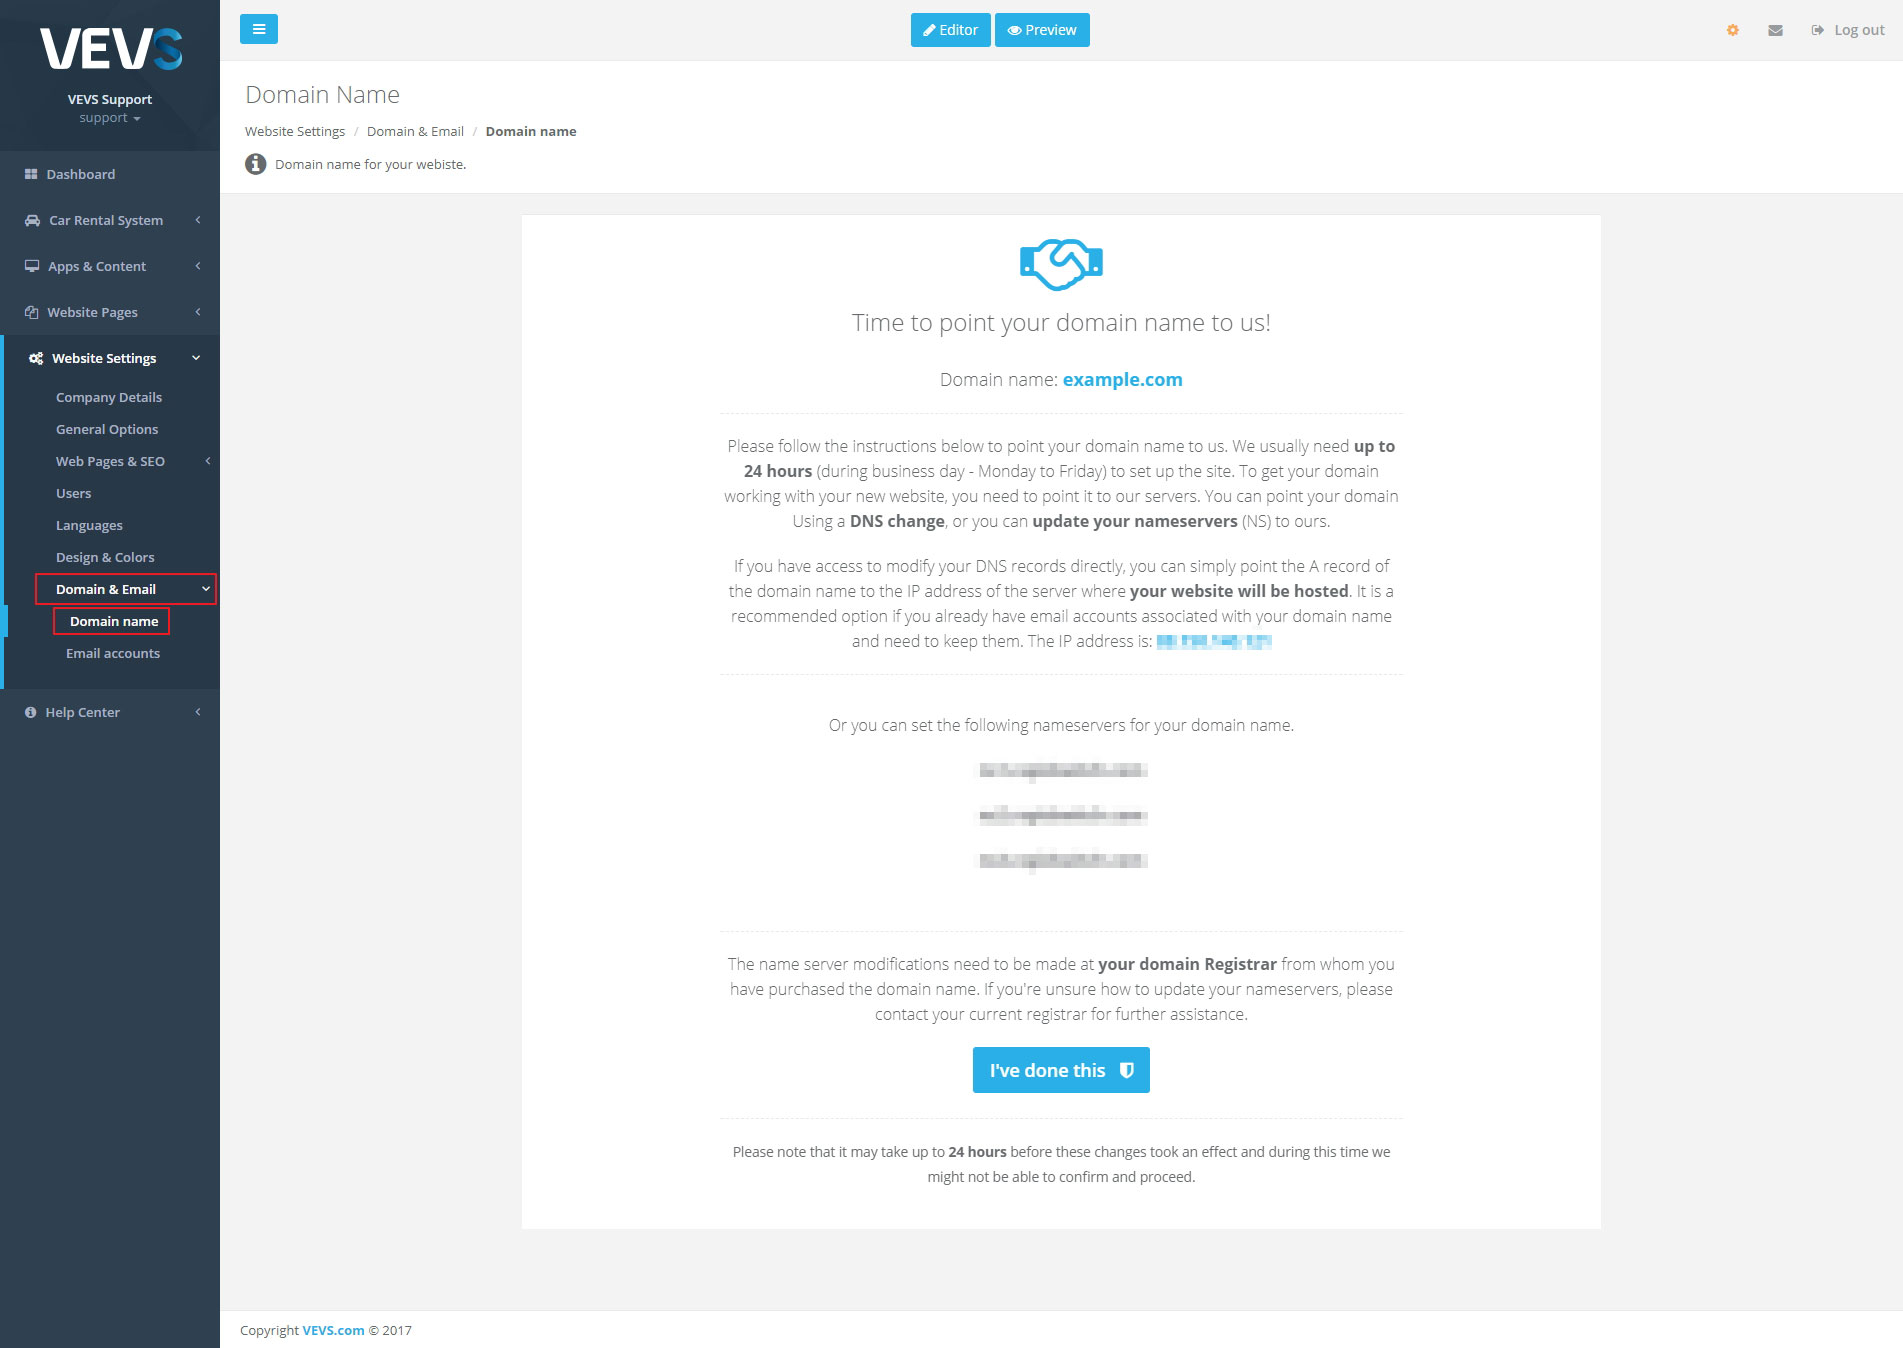
To point your domain to our servers and get your VEVS website up and running, just go to Website Settings / Domain & Email / Domain Name in your website's administration page.
If you have purchased your domain name already, you need to log into your registrar profile and replace the DNS settings of your current domain name with the ones we have provided to you.
Important note: If you are already using mailboxes with this domain name and hosting account, and you wish to keep them in the future, then we strongly advise you to point only the A-record to the IP address shown in the settings. Otherwise, if you apply both our A-record and Nameservers, your previous mailboxes will be automatically disregarded and no longer active.
For more information feel free to contact us.
Use Gmail to send email from your email accounts created by VEVS
In order to fully condense the use of another email address into just your Gmail account, you'll need to first configure your Gmail account to be able to send mail from that account. After going through this process, you will be able to send email from within your Gmail account that looks as though it was sent from your email address that we have created for your domain name — neat stuff indeed.
- Go to your Gmail settings on the web.
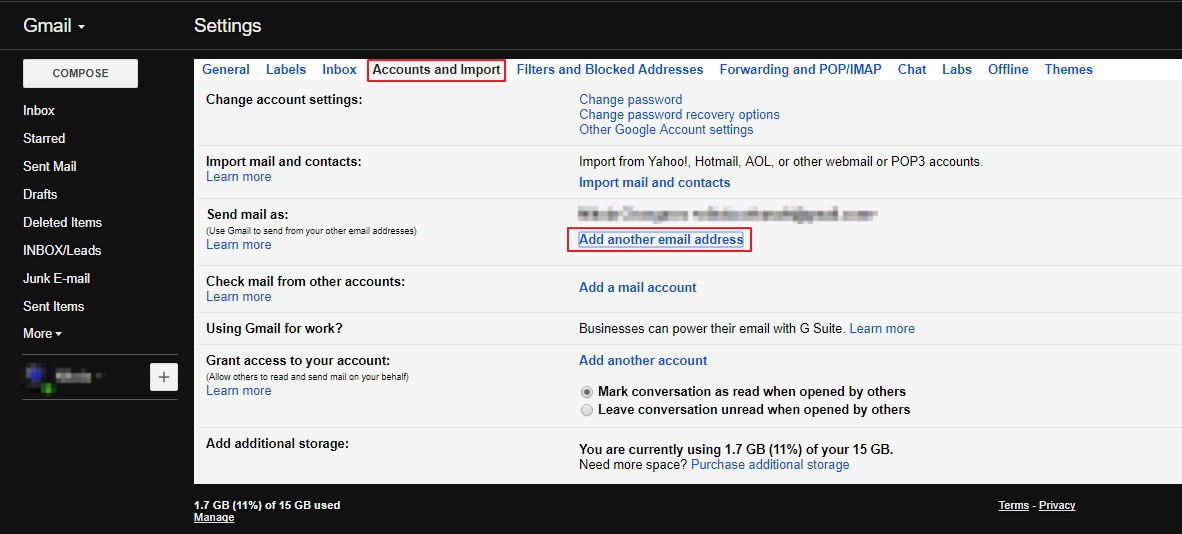
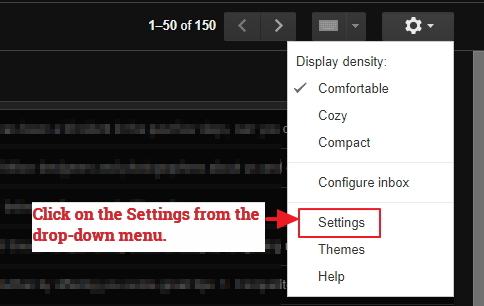
In Gmail on the web, go the Settings by clicking the gear in the top-right corner of the interface and clicking "Settings". On the next screen, click the tab at the top of the interface labeled "Accounts and Import". Then click "Add another email address you own", which will show up underneath your main Gmail account in the "Send mail as:" section.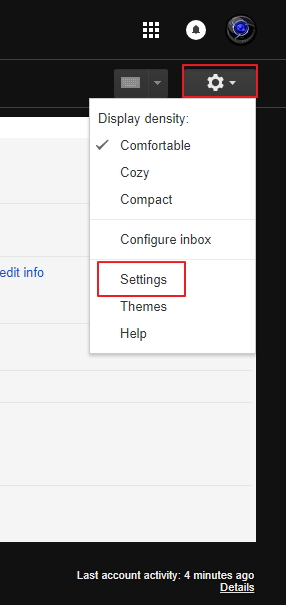
- Enter the email address we created for you.
When you click that link, it'll pop open a window that walks you through the steps of configuring another email address.
First, you'll enter a name for the account (auto-filled with your own name), and then the full email address. By default, the address will be treated as an alias — this means you'll be able to send an email that looks exactly as it would coming directly from that address, rather than from another provider. Click "Next step".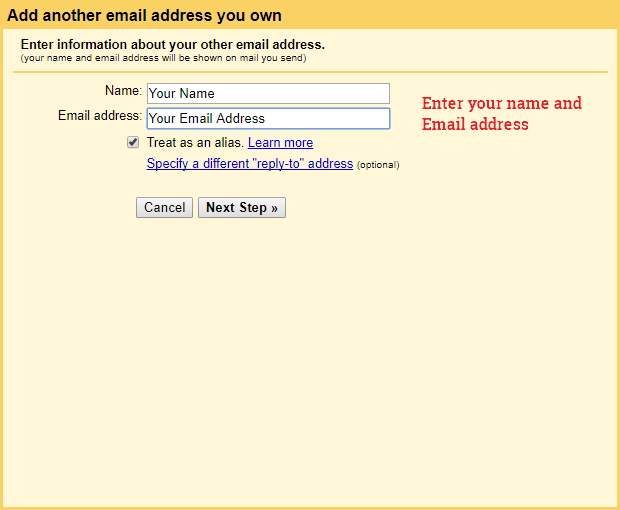
- Choose SMTP server
Here you will be presented with the options to set up the SMTP settings for your email accounts which we created for your domain name. This will be needed in order to allow you to send the emails via your Gmail account. You should set the following details:
SMTP Server: webmail.vevs.com
Port:465
Username: Your full email address name as provided by the VEVS support
Password: The email address password as provided by VEVS support
IMPORTANT NOTE:
If you change your email account password at the VEVS Webmail site - you will have to edit these settings later and enter the correct SMTP password.
Click "Next step".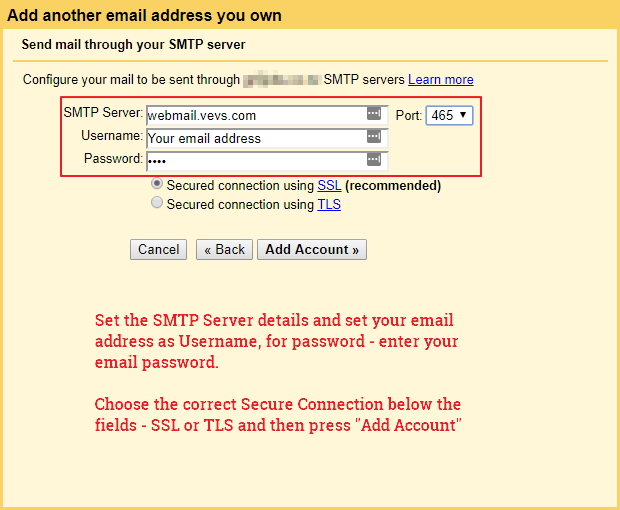
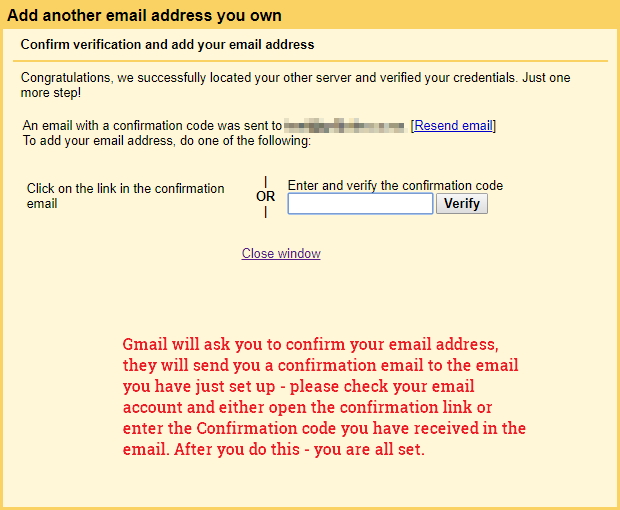
- Verification email send, receive and enter verification code.
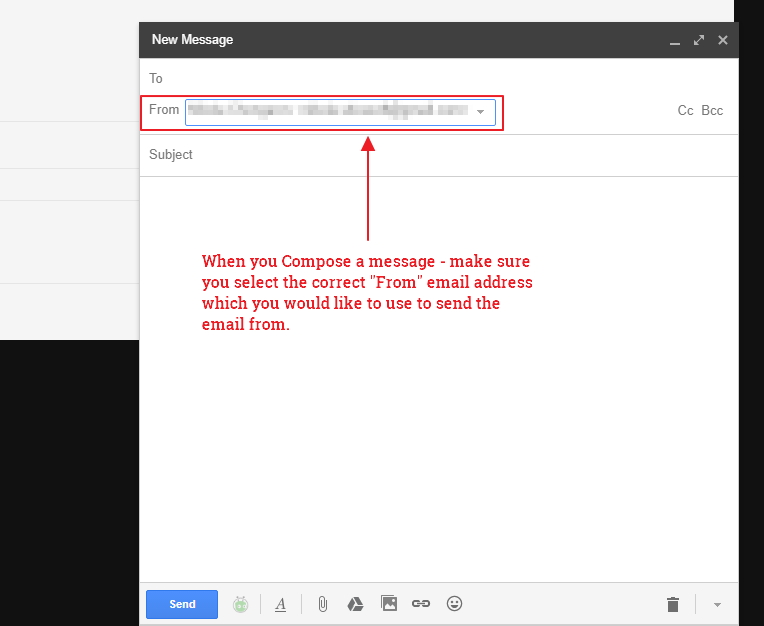
- Send Email from the email account we have created for you:
Use Gmail to receive email from your email accounts created by VEVS
Receiving email from your accounts created by VEVS directly into Gmail. The standardized way to accomplish this is with a protocol called POP3, which will let Gmail periodically pull email from another account and have it arrive in your Gmail inbox.
To get started, head back into the Gmail settings on the web and look for the "Add a POP3 mail account you own" option, which is directly underneath where you just added your other email accounts. Click that link, and a window will pop up to get you started.
Enter your email address, password and configuration options
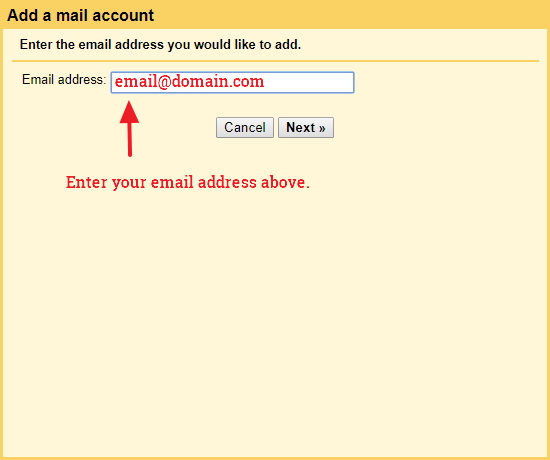
You'll be prompted to enter the email address which you'd like to receive the emails from.
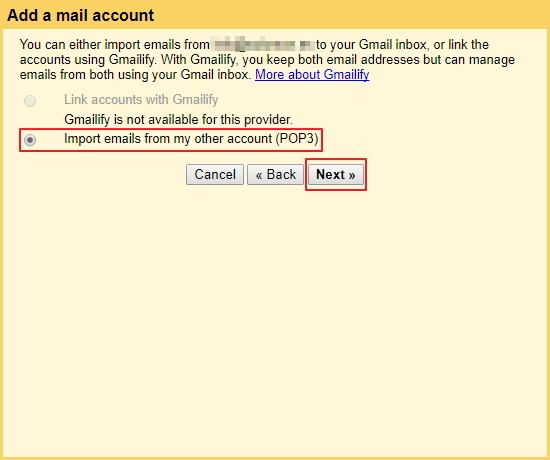
Choose "Import emails from my other account (POP3)" option and click "Next".
You'll find a slightly more complicated screen to do all of the configuration at once. You'll need to enter the following:
1. Username: (Enter your full email account name as provided by the VEVS team)
2. Password: (The password provided to you by the VEVS team or the one you have set later via the Webmail page)
3. POP server: webmail.vevs.com
4. Port: 995
5. Check the checkbox for the following additional settings:
- "Leave a copy of retrieved message on the server"
- "Label incoming messages"
6. Click on "Add Account"
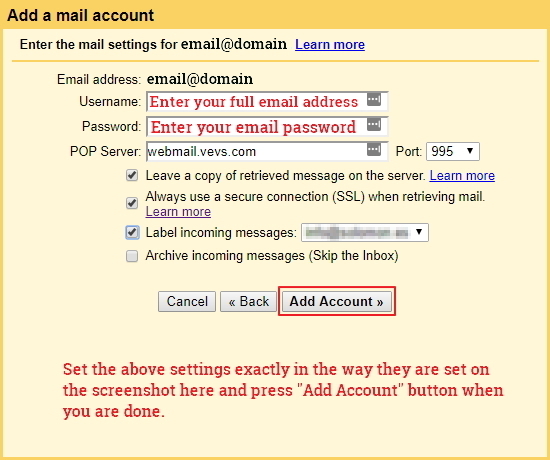
Once you set the above settings you will start receiving the emails from the email account our VEVS Support Staff has set up for your domain name.


